
I always wanted to work on Azure CDN. It is a Content Delivery Network backed by Azure's infrastructure and is pretty much flawless. In this post, we would be dealing with a Premium Verizon instance. I would suggest using this instead of the standard tiers despite a pricing gap because of the advanced feature set which is available. There is a nice comparison provided over here.
The requirement in this case was that I had to enable CORS on a production instance of the CDN. As said above, we would be dealing with a Premium Verizon instance of Azure CDN.
Please note that even if you have setup CORS headers on the origin server, those will be ignored and you have to configure them on the CDN instance.
To enable CORS on the CDN instance, follow the below steps -
-
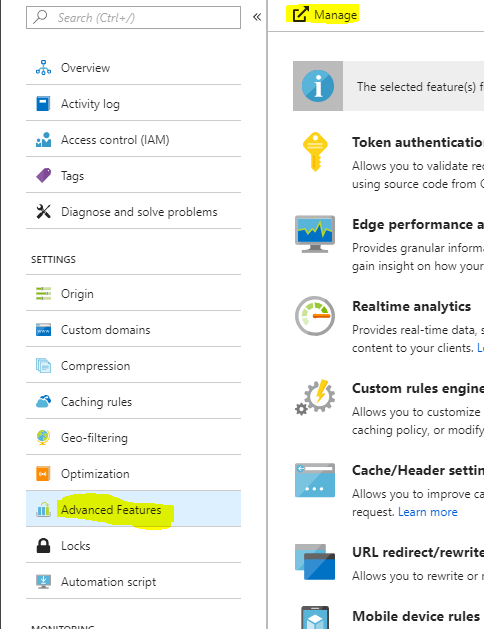
Open the CDN resource in Azure Portal, click on
Advanced Featuresand then click onManagebutton at the top. This will open a new tab on your browser -
-
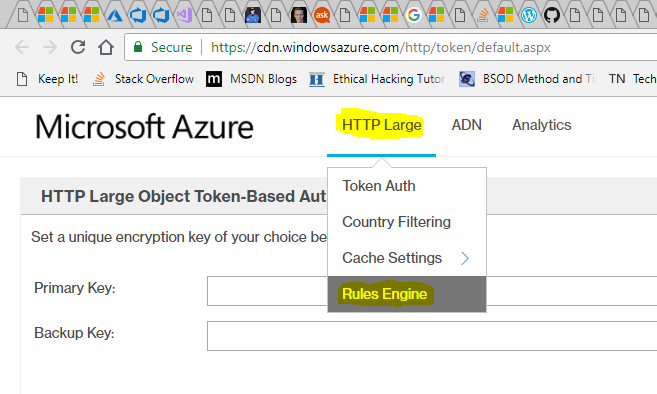
Now hover on
HTTP Largeand then click onRules Engineas below -
-
Add the rules to modify the CDN's response headers to include
Access-Control-Allow-Origin. The Verizon Premium CDN uses a Perl based REGEX engine. You can find more information over here. The interface allows you to have branching of conditions as well. Please do note that after you click on the + Features button or + Matches button, it could take a couple of seconds before the UI changes. Depending on the number of domains, you can setup a wildcard rule, regex based rule or a single domain rule.
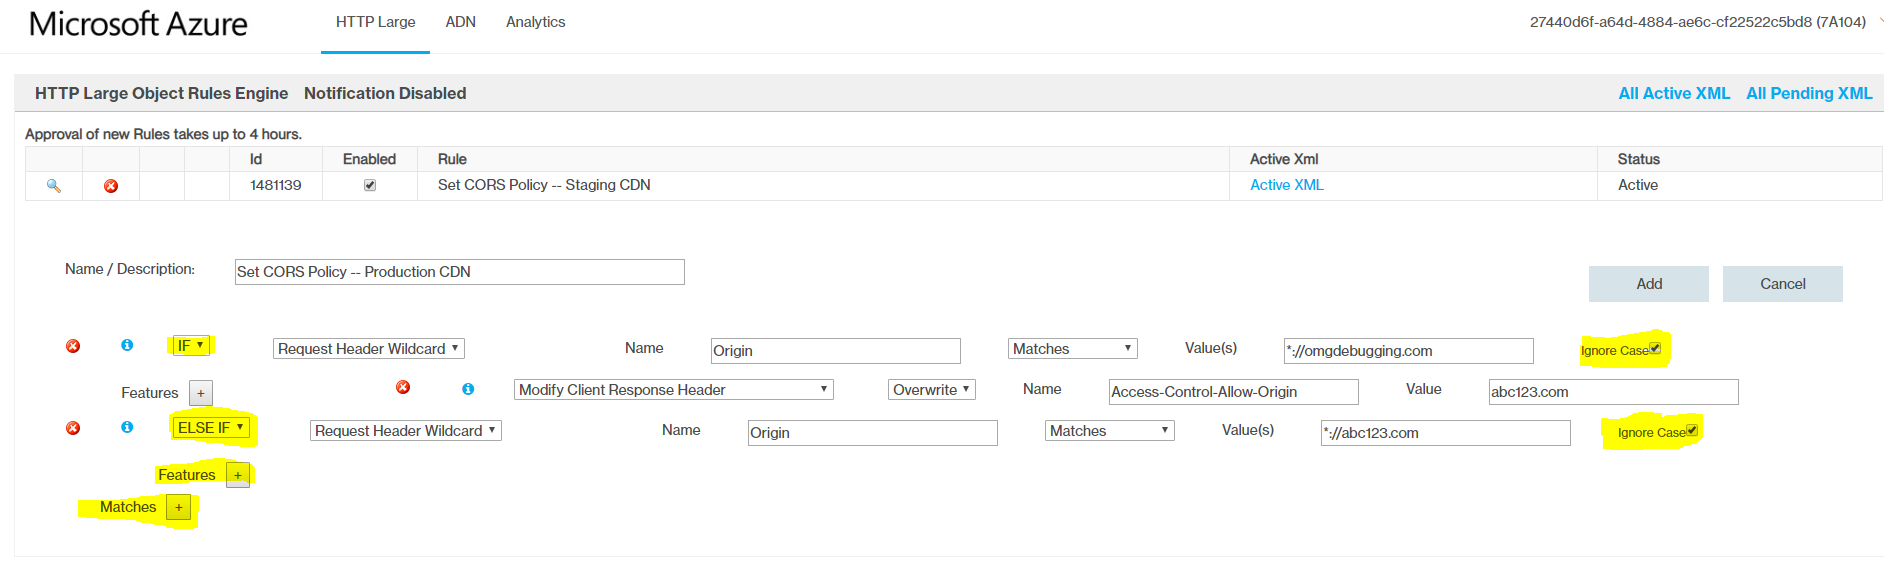
Do note that if you are using Azure Web Apps with Custom Domains, you would have to add both your primary domain(s) and the default domain provided by azure (**something**.azurewebsites.net) -
Once you have typed the rules, click on the Add button at the top.
-
After the addition, you would notice that the State of the rule is Pending XML -

This is because the rules which have just been added are validated and then added to the various CDN edge nodes across the world. It can take up to 4 hours or so for the rule to get in "Active" state.
You can also configure Notification by clicking on the Notification Disabled (Highlighted) link to configure email address to receive the alert once the rule(s) are active.
-
Once the rule is active, go back to Azure portal and open the CDN instance. Click on Purge button. When you are asked about what content needs to be purged, tick the Purge all checkbox and then click on OK.
-
Once the purge request is complete, load a single resource in CDN(s) across all the edge nodes by clicking on the Load button and then try accessing that single resource to ensure that the headers are being modified properly -
Once you are able to see that CORS is working, push the code changes to link files to CDN instead of local filesystem.
IT CAN EASILY TAKE A COUPLE OF HOURS FOR THE CDN CHANGES TO BE IN EFFECT. Even once the changes are in effect at the edge nodes, there might be caching issues in the browser and a Ctrl+F5 reload should fix the cache.